
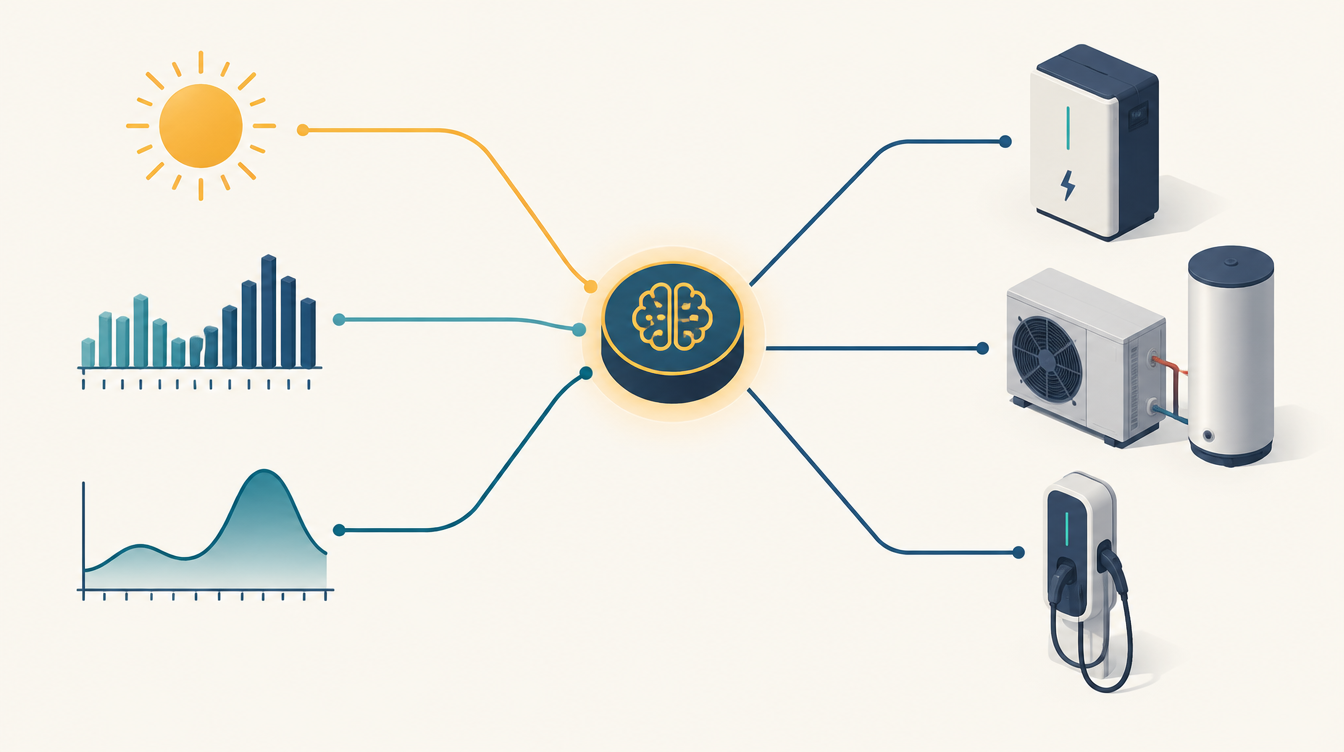
How EMHASS and Home Assistant turned a Deye battery, an LG heat pump and evcc into one energy system. With the settings that work, and the mistakes that came first.
This describes one working installation in the Netherlands, built in September and October 2026. It is not a manual to follow blindly; it is what I wish I had read before I started.
New to Home Assistant itself? Start with What is Home Assistant?
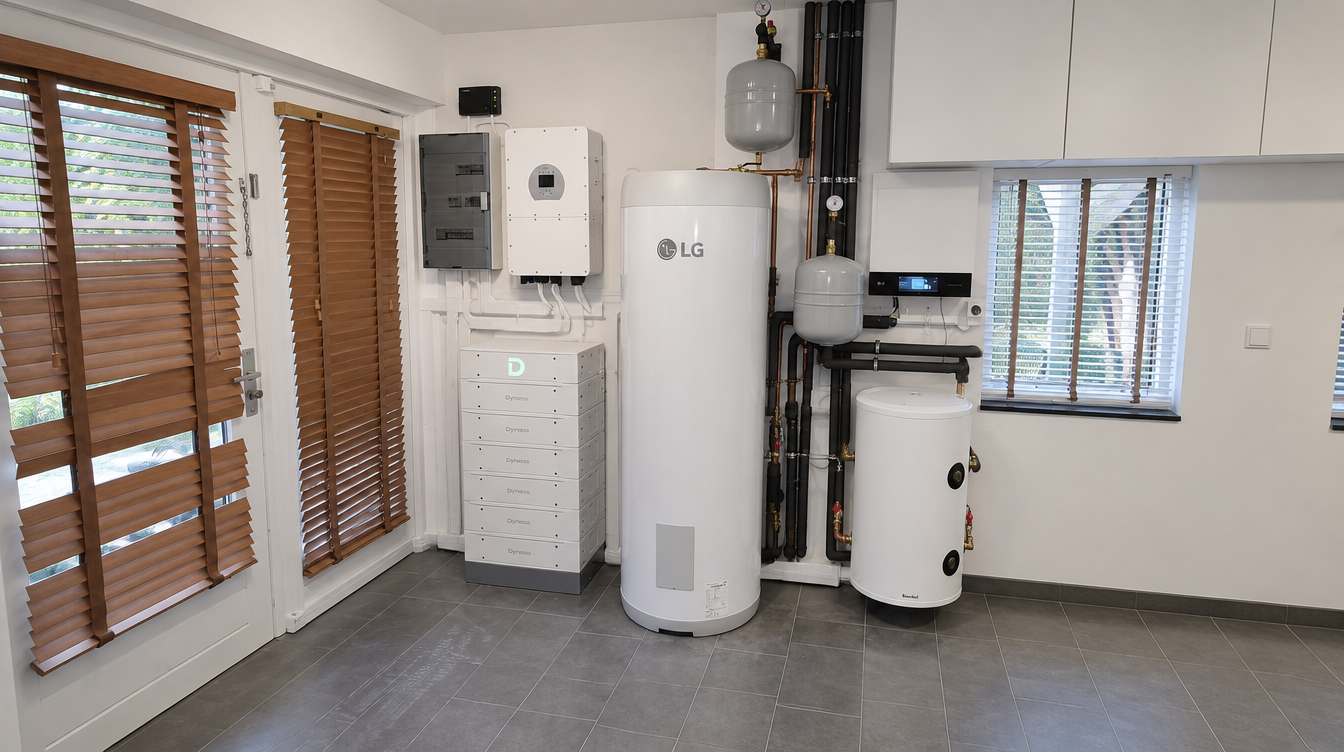
| Component | What |
|---|---|
| Inverter | Deye hybrid, 3-phase, 12 kW (Sunsynk add-on) |
| Grid meter | Eastron SDM630-M (MID) at the main connection, read by the Deye over RS485 |
| Battery | Dyness HV, 30.7 kWh, window 20–95 % |
| Solar | 18 × 295 Wp, Enphase IQ7, AC-coupled on the Gen port |
| Heat pump | LG Therma V R290 monobloc 9 kW, Modbus RTU |
| EV charger | Zaptec Go 2, controlled by evcc |
| Tariff | Tibber, 96 quarter-hour prices per day |
| Brain | EMHASS, every 15 minutes, 36 hours ahead |
Why it is built this way
A home battery, a heat pump and an electric car each come with their own app, and each app thinks it is the only one. The battery charges from the sun while the car has already used that same sun. The heat pump heats the hot water at 19:00, when electricity is most expensive.
The goal was one place where every decision comes together, based on tomorrow’s quarter-hour prices, the solar forecast and the household’s consumption pattern. Home Assistant is the platform, EMHASS does the maths, and a small layer of my own automations translates the plan to the hardware.
What makes this project different from most EMHASS setups: EMHASS does not control the hardware directly. A translation layer sits in between. It checks the plan, limits it and converts it into the inverter’s language. That layer took more time than EMHASS itself, and it also caught most of the mistakes.
Architecture: one owner per actuator
The most important design principle fits in one sentence: every device that can switch something has exactly one piece of software that writes to it. Two writers on the same actuator caused two incidents in the first week, including a battery that was exported from 81 down to 25 %.
Tibber (prices)  ─┐
Open-Meteo (sun) ─┤
Load buffer (48h) ┼──> Payload ──> EMHASS (every 15 min, 36 h ahead)
Sensors (SoC)   ──┘                 │
                                    ├── p_batt, p_grid ──> Translator ──> Deye + battery
                                    └── p_deferrable0 ──> Hot water  ──> LG heat pump
HA room thermostat ───────────────────────────────────────────────────> LG heat pump
evcc (price limit + battery priority) ────────────────────────────────> Zaptec charger
| Role | Who | Writes to |
|---|---|---|
| Brain | EMHASS (model predictive control, every 15 minutes) | Nothing; it only publishes a plan as sensors |
| Battery executor | Translator automation, every 5 minutes | The Deye, and nothing else does |
| Heat pump executor | Hot water and thermostat automations | The LG over Modbus |
| Car executor | evcc | The Zaptec |
| User | One dropdown: Auto, Force charge, Force discharge, Idle | Only that dropdown; the translator does the rest |
Everything lives in Home Assistant packages: one YAML file per topic, with lower-case file names (a capital letter caused the error invalid slug). Together about 160 entities, 20 automations and 2 scripts.
The four parts
- EMHASS and the battery: prices, a 36-hour horizon, a custom load forecast, hot water as a flexible load, and the translator that turns the plan into Deye commands.
- Heat pump over Modbus: reading and controlling the LG Therma V R290, which status bits you can trust, the heating curve and a room thermostat in Home Assistant.
- Car and evcc: who gets the sun, battery priority, a price limit and independent protection of the main fuse.
- Measuring and calibrating: checking current clamps under load, COP, how fast the house cools down, and the solar forecast.
Step by step
- Measure first, control later. Check the current clamps under load and watch the data for a week.
- One owner per actuator. Every app that already controls something becomes read-only or is switched off.
- Start with EMHASS and the battery only, a horizon of 96 steps, and a translator with dead bands and a safe fallback mode.
- Add hot water as the first deferrable load, and send the remaining hours along with it.
- Only extend the horizon once the load forecast is right.
- Balance car and battery through evcc, with independent protection of the main fuse.
- Calibrate the building before EMHASS controls the heating.
- Write everything down in one document: installation, architecture, pitfalls and incidents.
What went wrong along the way is described per incident on Lessons from practice (in Dutch for now).
This page contains an affiliate link. As an Amazon Associate I earn from qualifying purchases. The price stays the same for you.
These values apply to one installation. Check them against your own documentation; leave work on 230/400 V to a qualified electrician. Status: October 2026.